Log In to the UI
CloudStack provides a web-based UI that can be used by both administrators and end Users. The appropriate version of the UI is displayed depending on the credentials used to log in. The UI is available in all modern popular browsers including Chrome, Firefox, Edge and Safari. The UI uses API auto-discovery to discover APIs allowed for a logged-in User and creates navigation and views based on that, and requires the following:
API discovery (listApis) enabled for all roles that must use the UI
Modern browsers that are ES5-compliant
The URL is: (substitute your own management server IP address)
http://<management-server-ip-address>:8080/client
On a fresh Management Server installation, a guided tour splash screen appears. On later visits, you’ll see a login screen where you specify the following to proceed to your Dashboard:
Username -> The User ID of your Account. The default username is admin.
Password -> The password associated with the User ID. The password for the default username is password.
Domain -> If you are a root User, leave this field blank.
Note
Since 4.21 it is possible to login to a specific Project view by enabling the ‘displayProjectFieldOnLogin’ setting on config.json (which is disabled by default). Please refer to: Enable Login to Project View.
If you are a User in the sub-domains, enter the full path to the domain, excluding the root domain.
For example, suppose multiple levels are created under the root domain, such as Comp1/hr. The Users in the Comp1 domain should enter Comp1 in the Domain field, whereas the Users in the Comp1/sales domain should enter Comp1/sales.
For more guidance about the choices that appear when you log in to this UI, see Logging In as the Root Administrator.
End User’s UI Overview
The CloudStack UI helps Users of cloud infrastructure to view and use their cloud resources, including Instances, Templates and ISOs, data volumes and Snapshots, Guest Networks, and IP addresses. If the User is a member or administrator of one or more CloudStack projects, the UI can provide a project-oriented view.
Root Administrator’s UI Overview
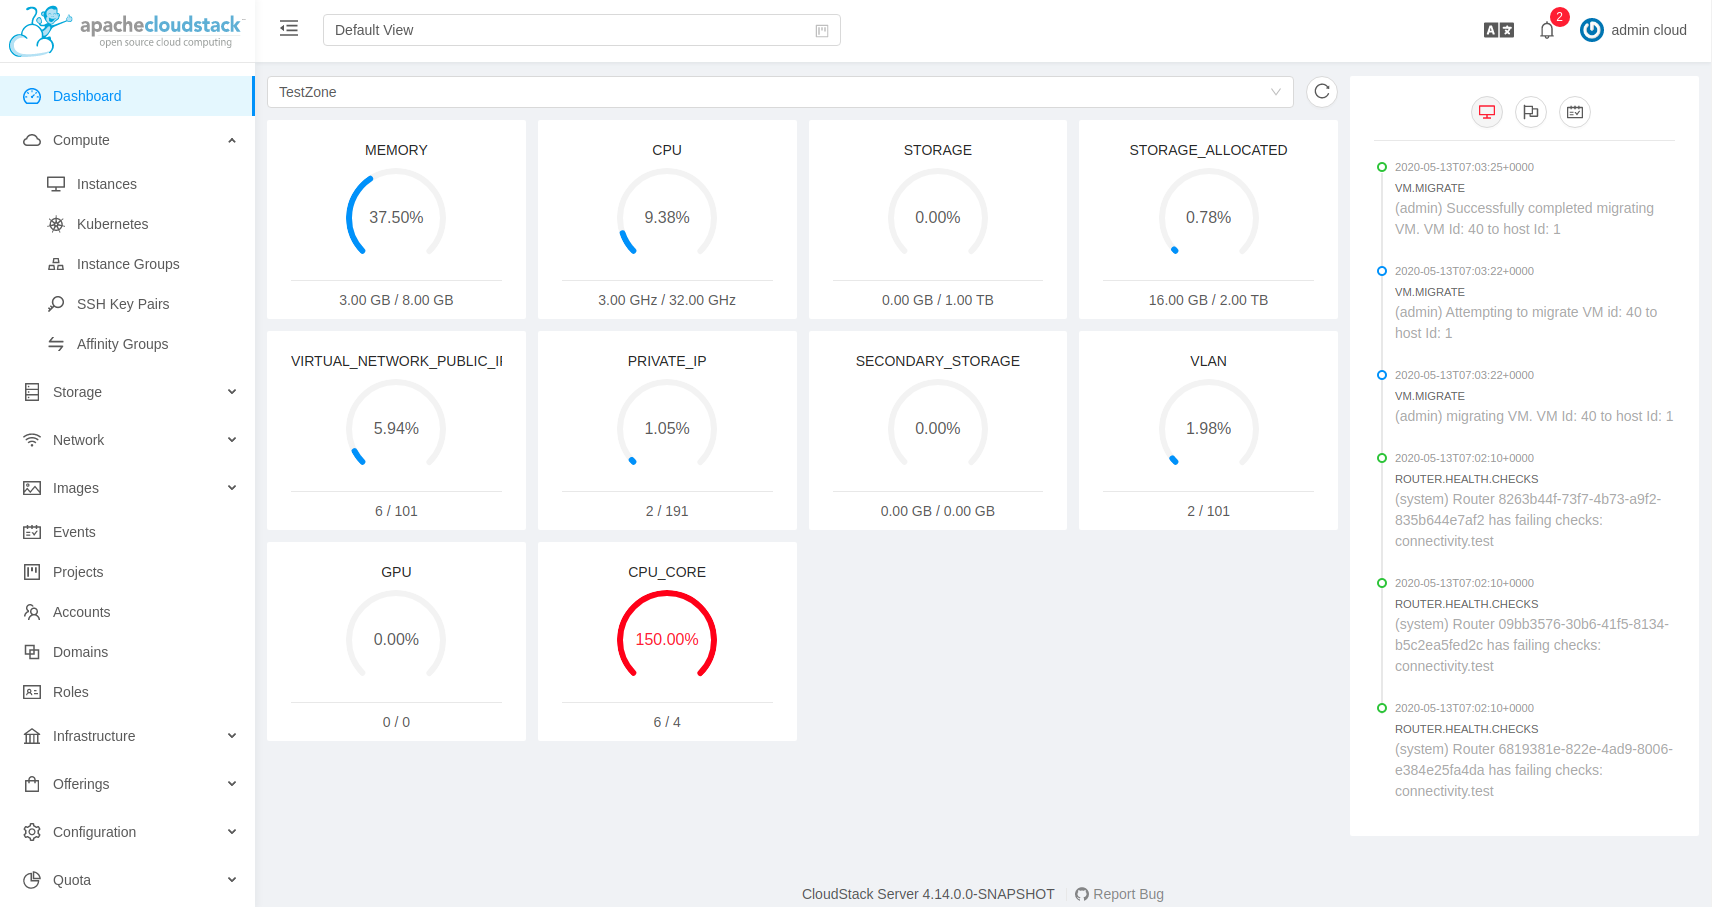
The CloudStack UI helps the CloudStack administrator provision, view, and manage the cloud infrastructure, domains, User Accounts, projects, and configuration settings. The first time you start the UI after a fresh Management Server installation, you can choose to follow a guided tour to provision your cloud infrastructure. On subsequent logins, the dashboard of the logged-in user appears. The various links in this screen and the navigation bar on the left provide access to a variety of administrative functions. The root administrator can also use the UI to perform all the same tasks that are present in the end-user’s UI.
Logging In as the Root Administrator
After the Management Server software is installed and running, you can run the CloudStack User interface. This UI is there to help you provision, view, and manage your cloud infrastructure.
Open your favorite Web browser and go to this URL. Substitute the IP address of your own Management Server:
http://<management-server-ip-address>:8080/client
After logging into a fresh Management Server installation, a guided tour splash screen appears. On later visits, you’ll be taken directly into the Dashboard.
If you see the first-time splash screen, choose one of the following.
Continue with basic setup. Choose this if you’re just trying CloudStack, and you want a guided walkthrough of the simplest possible configuration so that you can get started right away. We’ll help you set up a cloud with the following features: a single machine that runs CloudStack software and uses NFS to provide storage; a single machine running Instances under the XenServer or KVM hypervisor; and a shared public Network.
The prompts in this guided tour should give you all the information you need, but if you want just a bit more detail, you can follow along in the Trial Installation Guide.
I have used CloudStack before. Choose this if you have already gone through a design phase and planned a more sophisticated deployment, or you are ready to start scaling up a trial cloud that you set up earlier with the basic setup screens. In the Administrator UI, you can start using the more powerful features of CloudStack, such as advanced VLAN Networking, high availability, additional Network elements such as load balancers and firewalls, and support for multiple hypervisors including Citrix XenServer, KVM, and VMware vSphere.
The root administrator Dashboard appears.
You should set a new root administrator password. If you chose basic setup, you’ll be prompted to create a new password right away. If you chose experienced user, use the steps in Changing the Root Password.
Warning
You are logging in as the root administrator. This Account manages the CloudStack deployment, including physical infrastructure. The root administrator can modify configuration settings to change basic functionality, create or delete User Accounts, and take many actions that should be performed only by an authorized person. Please change the default password to a new, unique password.
Changing the Root Password
During installation and ongoing cloud administration, you will need to log in to the UI as the root administrator. The root administrator Account manages the CloudStack deployment, including physical infrastructure. The root administrator can modify configuration settings to change basic functionality, create or delete User Accounts, and take many actions that should be performed only by an authorized person. When first installing CloudStack, be sure to change the default password to a new, unique value.
Open your favorite Web browser and go to this URL. Substitute the IP address of your own Management Server:
http://<management-server-ip-address>:8080/client
Log in to the UI using the current root User ID and password. The default is admin, password.
Click Accounts.
Click the admin Account name.
Click View Users.
Click the admin user name.
Click the Change Password button.

Type the new password, and click OK.
Basic UI Customisation
Users can customize the CloudStack’s user interface by means of a configuration file at /etc/cloudstack/management/config.json which can be used to modify the theme, logos, etc. to align to one’s requirement.
To change the logo, login banner, error page icon, etc. the following details can be edited in config.json:
"apiBase": "/client/api",
"docBase": "http://docs.cloudstack.apache.org/en/latest",
"appTitle": "CloudStack",
"footer": "Licensed under the <a href='http://www.apache.org/licenses/' target='_blank'>Apache License</a>, Version 2.0.",
"loginFooter": "By logging, you are accepting the <a href='https://www.apache.org/foundation/policies/privacy.html'>usage policy</a>",
"logo": "assets/logo.svg",
"banner": "assets/banner.svg",
"error": {
    "404": "assets/404.png",
    "403": "assets/403.png",
    "500": "assets/500.png"
}
Customisation of themes is also possible, such as, modifying banner width, general color, etc. This can be done by editing the “theme” section of the config.json file. Theme section provides following properties for customisation:
Property |
Description |
|---|---|
@logo-background-color |
Changes the logo background color |
@project-nav-text-color |
Changes the navigation menu background color of the project |
@project-nav-text-color |
Changes the navigation menu background color of the project view. |
@navigation-background-color |
Changes the navigation menu background color |
@primary-color |
Changes the major background color of the page (background button, icon hover, etc). |
@link-color |
Changes the link color |
@link-hover-color |
Changes the link hover color |
@loading-color |
Changes the message loading color and page loading bar at the top page |
@success-color |
Changes success state color |
@processing-color |
Changes processing state color. Exp: progress status |
@warning-color |
Changes warning state color |
@error-color |
Changes error state color |
@heading-color |
Changes table header color |
@text-color |
Change in major text color |
@text-color-secondary |
Change of secondary text color (breadcrumb icon) |
@disabled-color |
Disable state color (disabled button, switch, etc) |
@border-color-base |
Change in major border color |
@logo-width |
Change the width of the logo top-left side |
@logo-height |
Change the height of the logo top-left side |
@banner-width |
Changes the width of the login banner |
@banner-height |
Changes the height of the login banner |
@error-width |
Changes the width of the error image |
@error-height |
Changes the height of the error image |
"theme": {
    "@logo-background-color": "#ffffff",
    "@project-nav-text-color": "#001529",
    "@navigation-text-color": "rgba(255, 255, 255, 0.65)",
    "@navigation-background-color": "#ffffff",
    "@navigation-text-color": "rgba(0, 0, 0, 0.65)",
    "@primary-color": "#1890ff",
    "@link-color": "#1890ff",
    "@link-hover-color": "#40a9ff",
    "@loading-color": "#1890ff",
    "@processing-color": "#1890ff",
    "@success-color": "#52c41a",
    "@warning-color": "#faad14",
    "@error-color": "#f5222d",
    "@font-size-base": "14px",
    "@heading-color": "rgba(0, 0, 0, 0.85)",
    "@text-color": "rgba(0, 0, 0, 0.65)",
    "@text-color-secondary": "rgba(0, 0, 0, 0.45)",
    "@disabled-color": "rgba(0, 0, 0, 0.25)",
    "@border-color-base": "#d9d9d9",
    "@border-radius-base": "4px",
    "@box-shadow-base": "0 2px 8px rgba(0, 0, 0, 0.15)",
    "@logo-width": "256px",
    "@logo-height": "64px",
    "@banner-width": "700px",
    "@banner-height": "110px",
    "@error-width": "256px",
    "@error-height": "256px"
}
Some assorted primary theme colours:
Blue: #1890FF
Red: #F5222D
Yellow: #FAAD14
Cyan: #13C2C2
Green: #52C41A
Purple: #722ED1
The config.json also allows to configure a special-purpose card that shows on the Account and project dashboards. This card is created using the userCard section that has a configurable title, icon and a list of configurable links that have a title, text (description), link and icon.
"userCard": {
  "title": "label.help",
  "icon": "question-circle-outlined",
  "links": [
    {
      "title": "Documentation",
      "text": "CloudStack documentation website",
      "link": "https://docs.cloudstack.apache.org/en/latest/",
      "icon": "read-outlined"
    },
    {
      "title": "API Documentation",
      "text": "Refer to API documentation",
      "link": "https://cloudstack.apache.org/api.html",
      "icon": "api-outlined"
    },
    {
      "title": "Email Support",
      "text": "Join CloudStack users mailing list to seek and provide support",
      "link": "mailto:users-subscribe@cloudstack.apache.org",
      "icon": "mail-outlined"
    },
    {
      "title": "Report Issue",
      "text": "Submit a bug or improvement request",
      "link": "https://github.com/apache/cloudstack/issues/new",
      "icon": "bug-outlined"
    }
  ]
},
Contextual help documentation URLs can be customized with the help of docBase and docHelpMappings properties. To override a particular documentation URL, a mapping can be added for the URL path in the config. A documentation URL is formed by combining the docBase URL base and a path set in the source code. Adding a mapping for any particular path in the configuration will result in generating documentation URL with overridden path. By default, docHelpMappings lists all existing documentation URL suffixes, mapped to themselves, in the configuration file that are used in the code.
{
   ...
   "docHelpMappings": {
     "adminguide/accounts.html": "adminguide/accounts.html",
     "adminguide/accounts.html#domains": "adminguide/accounts.html#domains",
     "adminguide/accounts.html#roles": "adminguide/accounts.html#roles",
     "adminguide/accounts.html#users": "adminguide/accounts.html#users",
     "adminguide/accounts.html#using-an-ldap-server-for-user-authentication": "adminguide/accounts.html#using-an-ldap-server-for-user-authentication",
     "adminguide/events.html": "adminguide/events.html",
     "adminguide/events.html#deleting-and-archiving-events-and-alerts": "adminguide/events.html#deleting-and-archiving-events-and-alerts",
     "adminguide/hosts.html#disabling-and-enabling-zones-pods-and-clusters": "adminguide/hosts.html#disabling-and-enabling-zones-pods-and-clusters",
     "adminguide/hosts.html#kvm-rolling-maintenance": "adminguide/hosts.html#kvm-rolling-maintenance",
     "adminguide/hosts.html#maintaining-hypervisors-on-hosts": "adminguide/hosts.html#maintaining-hypervisors-on-hosts",
     "adminguide/hosts.html#out-of-band-management": "adminguide/hosts.html#out-of-band-management",
     "adminguide/hosts.html#removing-hosts": "adminguide/hosts.html#removing-hosts",
     "adminguide/installguide/configuration.html#adding-a-cluster": "adminguide/installguide/configuration.html#adding-a-cluster",
     "adminguide/installguide/configuration.html#adding-a-host": "adminguide/installguide/configuration.html#adding-a-host",
     "adminguide/installguide/hosts.html#disabling-and-enabling-zones-pods-and-clusters": "adminguide/installguide/hosts.html#disabling-and-enabling-zones-pods-and-clusters",
     "adminguide/management.html#administrator-alerts": "adminguide/management.html#administrator-alerts",
     "adminguide/management.html#reporting-cpu-sockets": "adminguide/management.html#reporting-cpu-sockets",
     "adminguide/networking_and_traffic.html#acl-on-private-gateway": "adminguide/networking_and_traffic.html#acl-on-private-gateway",
     "adminguide/networking_and_traffic.html#adding-a-private-gateway-to-a-vpc": "adminguide/networking_and_traffic.html#adding-a-private-gateway-to-a-vpc",
     "adminguide/networking_and_traffic.html#adding-a-security-group": "adminguide/networking_and_traffic.html#adding-a-security-group",
     "adminguide/networking_and_traffic.html#adding-a-virtual-private-cloud": "adminguide/networking_and_traffic.html#adding-a-virtual-private-cloud",
     "adminguide/networking_and_traffic.html#advanced-zone-physical-network-configuration": "adminguide/networking_and_traffic.html#advanced-zone-physical-network-configuration",
     "adminguide/networking_and_traffic.html#basic-zone-physical-network-configuration": "adminguide/networking_and_traffic.html#basic-zone-physical-network-configuration",
     "adminguide/networking_and_traffic.html#configure-guest-traffic-in-an-advanced-zone": "adminguide/networking_and_traffic.html#configure-guest-traffic-in-an-advanced-zone",
     "adminguide/networking_and_traffic.html#configuring-a-virtual-private-cloud": "adminguide/networking_and_traffic.html#configuring-a-virtual-private-cloud",
     "adminguide/networking_and_traffic.html#configuring-network-access-control-list": "adminguide/networking_and_traffic.html#configuring-network-access-control-list",
     "adminguide/networking_and_traffic.html#creating-acl-lists": "adminguide/networking_and_traffic.html#creating-acl-lists",
     "adminguide/networking_and_traffic.html#creating-and-updating-a-vpn-customer-gateway": "adminguide/networking_and_traffic.html#creating-and-updating-a-vpn-customer-gateway",
     "adminguide/networking_and_traffic.html#creating-an-internal-lb-rule": "adminguide/networking_and_traffic.html#creating-an-internal-lb-rule",
     "adminguide/networking_and_traffic.html#creating-a-vpn-connection": "adminguide/networking_and_traffic.html#creating-a-vpn-connection",
     "adminguide/networking_and_traffic.html#creating-a-vpn-gateway-for-the-vpc": "adminguide/networking_and_traffic.html#creating-a-vpn-gateway-for-the-vpc",
     "adminguide/networking_and_traffic.html#enabling-or-disabling-static-nat": "adminguide/networking_and_traffic.html#enabling-or-disabling-static-nat",
     "adminguide/networking_and_traffic.html#load-balancing-across-tiers": "adminguide/networking_and_traffic.html#load-balancing-across-tiers",
     "adminguide/networking_and_traffic.html#releasing-an-ip-address-allotted-to-a-vpc": "adminguide/networking_and_traffic.html#releasing-an-ip-address-allotted-to-a-vpc",
     "adminguide/networking_and_traffic.html#reserving-public-ip-addresses-and-vlans-for-accounts": "adminguide/networking_and_traffic.html#reserving-public-ip-addresses-and-vlans-for-accounts",
     "adminguide/networking_and_traffic.html#restarting-and-removing-a-vpn-connection": "adminguide/networking_and_traffic.html#restarting-and-removing-a-vpn-connection",
     "adminguide/networking_and_traffic.html#security-groups": "adminguide/networking_and_traffic.html#security-groups",
     "adminguide/networking_and_traffic.html#setting-up-a-site-to-site-vpn-connection": "adminguide/networking_and_traffic.html#setting-up-a-site-to-site-vpn-connection",
     "adminguide/networking_and_traffic.html#updating-and-removing-a-vpn-customer-gateway": "adminguide/networking_and_traffic.html#updating-and-removing-a-vpn-customer-gateway",
     "adminguide/networking.html#creating-a-new-network-offering": "adminguide/networking.html#creating-a-new-network-offering",
     "adminguide/networking.html#network-offerings": "adminguide/networking.html#network-offerings",
     "adminguide/networking.html#network-service-providers": "adminguide/networking.html#network-service-providers",
     "adminguide/projects.html": "adminguide/projects.html",
     "adminguide/projects.html#accepting-a-membership-invitation": "adminguide/projects.html#accepting-a-membership-invitation",
     "adminguide/projects.html#adding-project-members-from-the-ui": "adminguide/projects.html#adding-project-members-from-the-ui",
     "adminguide/projects.html#creating-a-new-project": "adminguide/projects.html#creating-a-new-project",
     "adminguide/projects.html#sending-project-membership-invitations": "adminguide/projects.html#sending-project-membership-invitations",
     "adminguide/projects.html#suspending-or-deleting-a-project": "adminguide/projects.html#suspending-or-deleting-a-project",
     "adminguide/reliability.html#ha-for-hosts": "adminguide/reliability.html#ha-for-hosts",
     "adminguide/service_offerings.html#compute-and-disk-service-offerings": "adminguide/service_offerings.html#compute-and-disk-service-offerings",
     "adminguide/service_offerings.html#creating-a-new-compute-offering": "adminguide/service_offerings.html#creating-a-new-compute-offering",
     "adminguide/service_offerings.html#creating-a-new-disk-offering": "adminguide/service_offerings.html#creating-a-new-disk-offering",
     "adminguide/service_offerings.html#creating-a-new-system-service-offering": "adminguide/service_offerings.html#creating-a-new-system-service-offering",
     "adminguide/service_offerings.html#modifying-or-deleting-a-service-offering": "adminguide/service_offerings.html#modifying-or-deleting-a-service-offering",
     "adminguide/service_offerings.html#system-service-offerings": "adminguide/service_offerings.html#system-service-offerings",
     "adminguide/storage.html#creating-a-new-volume": "adminguide/storage.html#creating-a-new-volume",
     "adminguide/storage.html#id2": "adminguide/storage.html#id2",
     "adminguide/storage.html#primary-storage": "adminguide/storage.html#primary-storage",
     "adminguide/storage.html#resizing-volumes": "adminguide/storage.html#resizing-volumes",
     "adminguide/storage.html#secondary-storage": "adminguide/storage.html#secondary-storage",
     "adminguide/storage.html#uploading-an-existing-volume-to-a-virtual-machine": "adminguide/storage.html#uploading-an-existing-volume-to-a-virtual-machine",
     "adminguide/storage.html#working-with-volumes": "adminguide/storage.html#working-with-volumes",
     "adminguide/storage.html#working-with-volume-snapshots": "adminguide/storage.html#working-with-volume-snapshots",
     "adminguide/systemvm.html": "adminguide/systemvm.html",
     "adminguide/systemvm.html#upgrading-virtual-routers": "adminguide/systemvm.html#upgrading-virtual-routers",
     "adminguide/systemvm.html#virtual-router": "adminguide/systemvm.html#virtual-router",
     "adminguide/templates.html": "adminguide/templates.html",
     "adminguide/templates.html#attaching-an-iso-to-a-vm": "adminguide/templates.html#attaching-an-iso-to-a-vm",
     "adminguide/templates.html#exporting-templates": "adminguide/templates.html#exporting-templates",
     "adminguide/templates.html#id10": "adminguide/templates.html#id10",
     "adminguide/templates.html#sharing-templates-with-other-accounts-projects": "adminguide/templates.html#sharing-templates-with-other-accounts-projects",
     "adminguide/templates.html#uploading-templates-and-isos-from-a-local-computer": "adminguide/templates.html#uploading-templates-and-isos-from-a-local-computer",
     "adminguide/templates.html#uploading-templates-from-a-remote-http-server": "adminguide/templates.html#uploading-templates-from-a-remote-http-server",
     "adminguide/templates.html#working-with-isos": "adminguide/templates.html#working-with-isos",
     "adminguide/virtual_machines.html": "adminguide/virtual_machines.html",
     "adminguide/virtual_machines.html#affinity-groups": "adminguide/virtual_machines.html#affinity-groups",
     "adminguide/virtual_machines.html#backup-offerings": "adminguide/virtual_machines.html#backup-offerings",
     "adminguide/virtual_machines.html#change-affinity-group-for-an-existing-vm": "adminguide/virtual_machines.html#change-affinity-group-for-an-existing-vm",
     "adminguide/virtual_machines.html#changing-the-vm-name-os-or-group": "adminguide/virtual_machines.html#changing-the-vm-name-os-or-group",
     "adminguide/virtual_machines.html#creating-a-new-affinity-group": "adminguide/virtual_machines.html#creating-a-new-affinity-group",
     "adminguide/virtual_machines.html#creating-the-ssh-keypair": "adminguide/virtual_machines.html#creating-the-ssh-keypair",
     "adminguide/virtual_machines.html#creating-vm-backups": "adminguide/virtual_machines.html#creating-vm-backups",
     "adminguide/virtual_machines.html#creating-vms": "adminguide/virtual_machines.html#creating-vms",
     "adminguide/virtual_machines.html#delete-an-affinity-group": "adminguide/virtual_machines.html#delete-an-affinity-group",
     "adminguide/virtual_machines.html#deleting-vms": "adminguide/virtual_machines.html#deleting-vms",
     "adminguide/virtual_machines.html#how-to-dynamically-scale-cpu-and-ram": "adminguide/virtual_machines.html#how-to-dynamically-scale-cpu-and-ram",
     "adminguide/virtual_machines.html#importing-backup-offerings": "adminguide/virtual_machines.html#importing-backup-offerings",
     "adminguide/virtual_machines.html#moving-vms-between-hosts-manual-live-migration": "adminguide/virtual_machines.html#moving-vms-between-hosts-manual-live-migration",
     "adminguide/virtual_machines.html#resetting-ssh-keys": "adminguide/virtual_machines.html#resetting-ssh-keys",
     "adminguide/virtual_machines.html#restoring-vm-backups": "adminguide/virtual_machines.html#restoring-vm-backups",
     "adminguide/virtual_machines.html#stopping-and-starting-vms": "adminguide/virtual_machines.html#stopping-and-starting-vms",
     "adminguide/virtual_machines.html#using-ssh-keys-for-authentication": "adminguide/virtual_machines.html#using-ssh-keys-for-authentication",
     "adminguide/virtual_machines.html#virtual-machine-snapshots": "adminguide/virtual_machines.html#virtual-machine-snapshots",
     "installguide/configuration.html#adding-a-pod": "installguide/configuration.html#adding-a-pod",
     "installguide/configuration.html#adding-a-zone": "installguide/configuration.html#adding-a-zone",
     "installguide/configuration.html#add-primary-storage": "installguide/configuration.html#add-primary-storage",
     "installguide/configuration.html#add-secondary-storage": "installguide/configuration.html#add-secondary-storage",
     "plugins/cloudian-connector.html": "plugins/cloudian-connector.html",
     "plugins/cloudstack-kubernetes-service.html": "plugins/cloudstack-kubernetes-service.html",
     "plugins/cloudstack-kubernetes-service.html#creating-a-new-kubernetes-cluster": "plugins/cloudstack-kubernetes-service.html#creating-a-new-kubernetes-cluster",
     "plugins/cloudstack-kubernetes-service.html#deleting-kubernetes-cluster": "plugins/cloudstack-kubernetes-service.html#deleting-kubernetes-cluster",
     "plugins/cloudstack-kubernetes-service.html#kubernetes-supported-versions": "plugins/cloudstack-kubernetes-service.html#kubernetes-supported-versions",
     "plugins/cloudstack-kubernetes-service.html#scaling-kubernetes-cluster": "plugins/cloudstack-kubernetes-service.html#scaling-kubernetes-cluster",
     "plugins/cloudstack-kubernetes-service.html#starting-a-stopped-kubernetes-cluster": "plugins/cloudstack-kubernetes-service.html#starting-a-stopped-kubernetes-cluster",
     "plugins/cloudstack-kubernetes-service.html#stopping-kubernetes-cluster": "plugins/cloudstack-kubernetes-service.html#stopping-kubernetes-cluster",
     "plugins/cloudstack-kubernetes-service.html#upgrading-kubernetes-cluster": "plugins/cloudstack-kubernetes-service.html#upgrading-kubernetes-cluster",
     "plugins/nuage-plugin.html?#optional-create-and-enable-vpc-offering": "plugins/nuage-plugin.html?#optional-create-and-enable-vpc-offering",
     "plugins/nuage-plugin.html?#vpc-offerings": "plugins/nuage-plugin.html?#vpc-offerings",
     "plugins/quota.html": "plugins/quota.html",
     "plugins/quota.html#quota-credits": "plugins/quota.html#quota-credits",
     "plugins/quota.html#quota-tariff": "plugins/quota.html#quota-tariff"
   },
   ...
}
Below example shows configuration changes for custom documentation help URLs:
By default, docBase is set to http://docs.cloudstack.apache.org/en/latest and contextual help on Instances page links to http://docs.cloudstack.apache.org/en/latest/adminguide/virtual_machines.html. To make Instances page link to http://mycustomwebsite.com/custom_vm_page.html, docBase can be set to http://mycustomwebsite.com and a docHelpMapping can be added for adminguide/virtual_machines.html as custom_vm_page.html.
{
   ...
   "docBase": http://mycustomwebsite.com,
   ...
   "docHelpMappings": {
      "adminguide/virtual_machines.html": "custom_vm_page.html",
      "adminguide/templates.html": "custom_templates_page.html"
   },
   ...
}
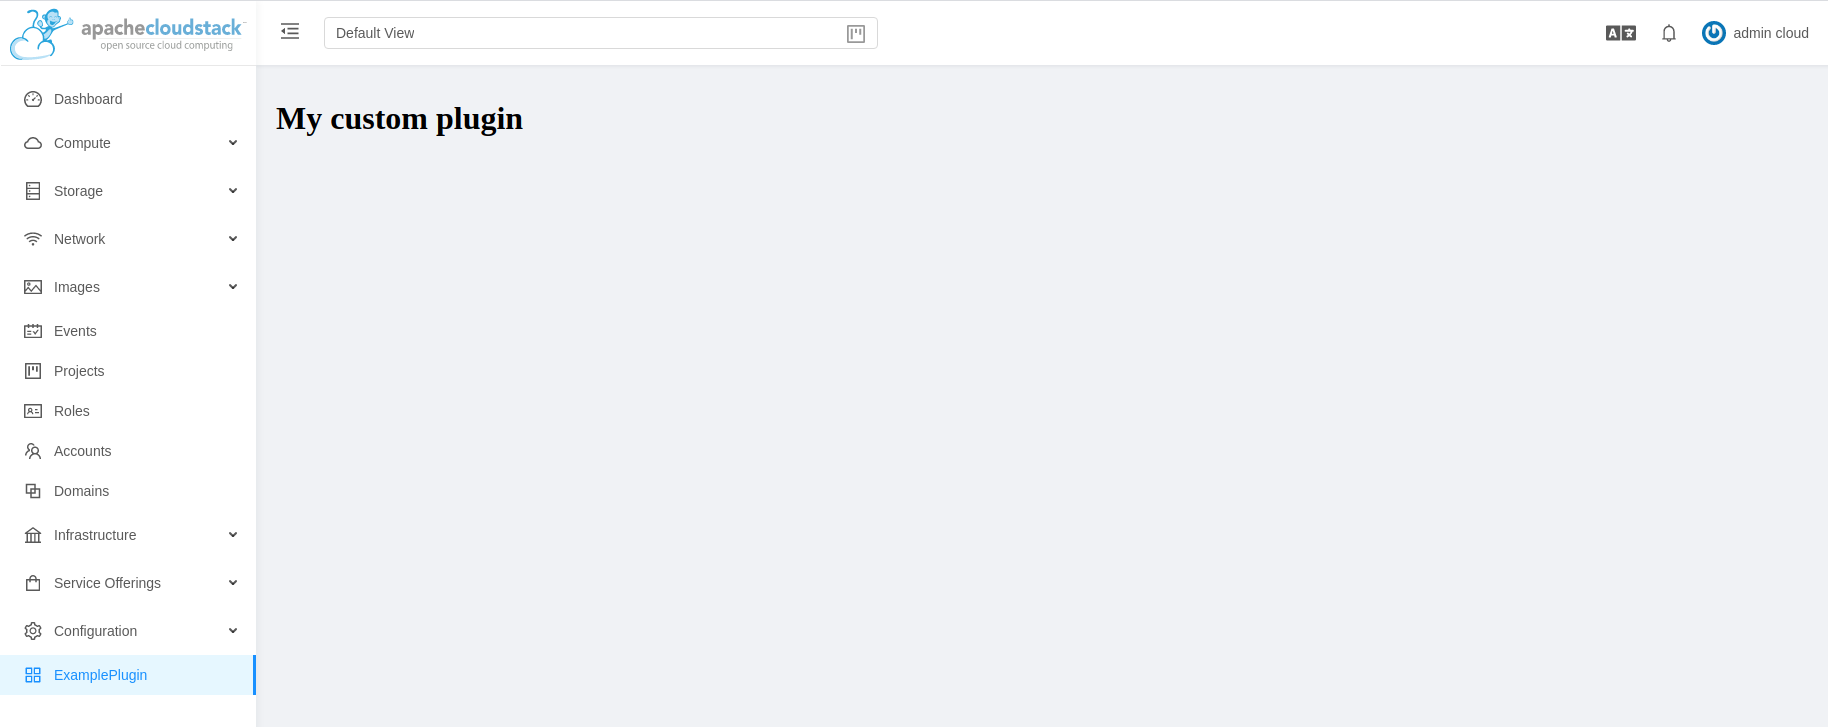
UI also provides option to show custom plugins for displaying custom HTML pages or HTTP services in an iframe. Such plugins can be listed in the config file using plugins property. Example for adding custom plugins:
{
   ...
   plugins: [
      {
         "name": "ExamplePlugin",
         "icon": "appstore-outlined",
         "path": "example.html"
      },
      {
         "name": "ExamplePlugin1",
         "icon": "appstore-outlined",
         "path": "https://cloudstack.apache.org/"
      }
   ]
   ...
}
icon for the plugin can be chosen from Ant Design icons listed at https://3x.antdv.com/components/icon.
Warning
Not all ant icons are supported at the moment. You will find a list of supported icons within the github repository in ui/src/core/lazy_lib/icons_use.js. To use an icon you need to transform the listed name. For example “PieChartOutlined” needs to be transformed to “pie-chart-outlined”, “ReadOutlined” needs to be transformed to “read-outlined”.
For displaying a custom HTML in the plugin, HTML file can be stored in the CloudStack management server’s web application directory on the server, i.e., /usr/share/cloudstack-management/webapp and path can be set to the name of the file. For displaying a service or a web page, URL can be set as the path of the plugin.
Announcement Banner
Admin can configure an announcement banner in config.json to display alerts or messages to all users. This banner is useful for communicating important notices such as performance issues, scheduled maintenance, or general announcements. To enable and customize the banner, use the announcementBanner section in the config.json file.
This section supports the following properties:
Configuration Example
"announcementBanner": {
  "enabled": true,
  "showIcon": true,
  "closable": true,
  "persistDismissal": true,
  "type": "warning",
  "message": "<strong>Performance Notice:</strong> We're experiencing high load. Some operations may be slower than usual.",
  "startDate": "2025-06-01T00:00:00Z",
  "endDate": "2025-07-16T00:00:00Z"
 }
Banner Display Example
Based on the configuration above, the following banner is shown in the user interface:

Properties Description
enabled: Enables or disables the announcement banner (true or false).
showIcon: Displays an icon alongside the message. The icon corresponds to the banner type.
closable: Allows users to close the banner.
persistDismissal: Remembers the user’s dismissal of the banner, so it doesn’t reappear.
type: Specifies the type of banner. Supported values are:
info
warning
error
success
message: The HTML-formatted content displayed in the banner.
startDate / endDate: Define the visibility window for the banner using ISO 8601 format (YYYY-MM-DDTHH:MM:SSZ).
Note
The message property supports basic HTML, allowing styled content such as <strong> tags for emphasis.
Banner’s background color changes based on type property value. White color is used for banner if type is not defined or has invalid value.
Multi-line message is supported, however recommendation is to limit it to 2 lines. Content may overlap banner for more than 2 lines.
Instance Image Selection Customisation
In the UI, there are several forms where the user needs to select an image (template/ISO) for an instance, such as deploying an instance, reinstalling an instance, creating a VNF appliance, etc. The image selection interface for these forms can be selected by the operator based on preference by specifying properties in the UI configuration file (config.json).
The configuration property _imageSelectionInterface_ can be set to one of these values: modern or legacy. The default value is modern.
When the modern interface is used, images will be categorized based on the guest operating system categories. Further customisation can be done using the configuration properties showUserCategoryForModernImageSelection and showAllCategoryForModernImageSelection to allow or disallow the display of additional categories.

The legacy interface will display images based on templatefilter/isofilter, i.e., Featured, Community, My Templates/ISOs, and Shared.

Advanced UI Customisation
The advanced UI customisation is possible only by changing JavaScript based config files which define rules for sections, names, icons, actions and components and by building the UI from the source available on github.com/apache/cloudstack repository. Advanced customisation may require some experience in JavaScript and VueJS, a development and customisation guide in the source repository.
Useful documentations:
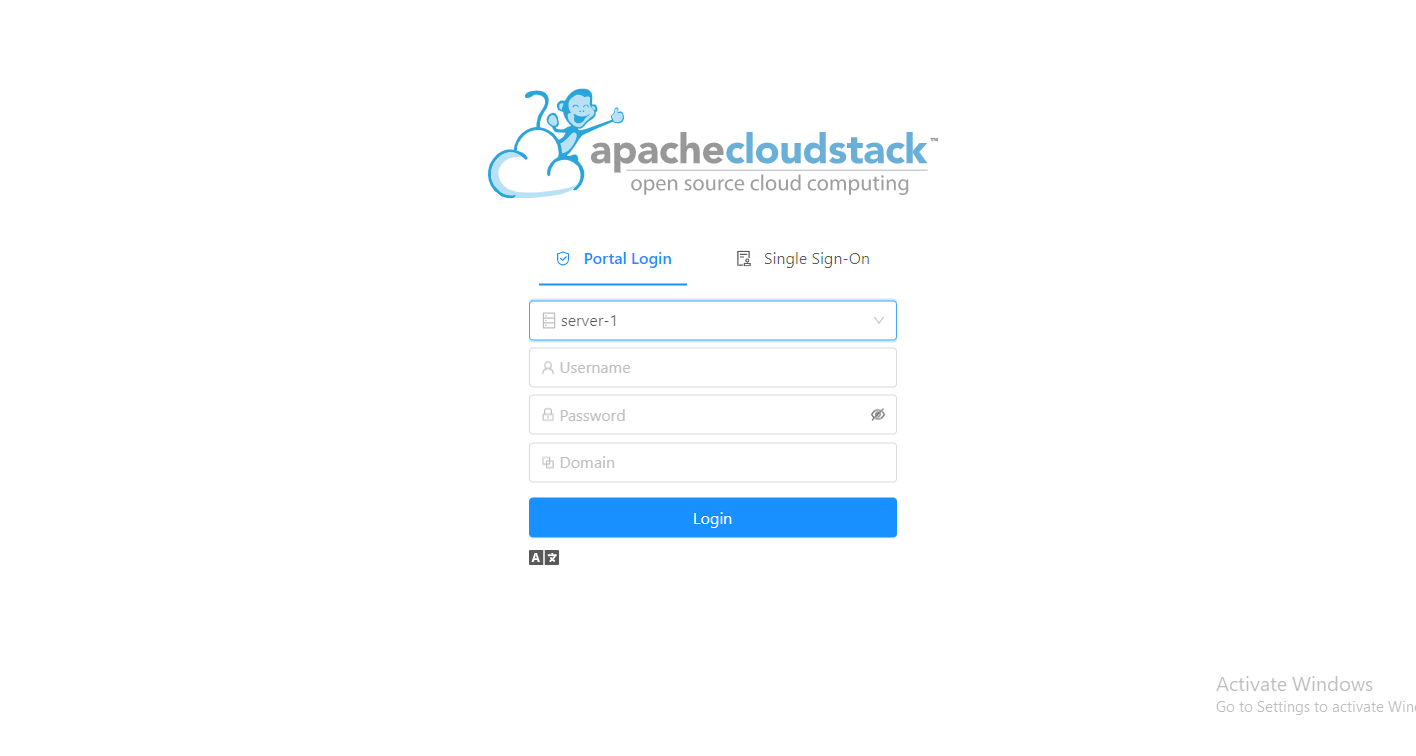
Multiple Management Support
User can use file /etc/cloudstack/management/config.json to configure the settings which allow Cloudstack to support multiple servers.
To Cloudstack support use multiple servers, the following details can be edited in config.json:
Property |
Description |
|---|---|
multipleServer |
Configure to allow Cloudstack to support multiple servers. |
servers |
List of servers to which Cloudstack can connect. |
{
   ...
   "servers" [
      {
         "name": "server-1",
         "apiHost": "/server-1",
         "apiBase": "/client/api",
      },
      {
         "name": "server-2",
         "apiHost": "",
         "apiBase": "/client/api",
      }
   ]
   ...
   "multipleServer": true
}
For the UI to work with different servers, it is necessary to configure the Nginx config proxy to allow connections to the respective servers without Cross-Origin (to be put into /etc/nginx/conf.d/default/conf or similar).
server {
    listen          80;
    server_name     localhost;
    location / {
        # /src/ui/dist contains the built UI webpack
        root        /src/ui/dist;
        index       index.html;
    }
    # for apiHost of server-1 located in config.json
    location /server-1/client/ {
        rewrite ^/server-1/(.*)$ /$1 break;
        # server's actual URI
        proxy_pass   https://server-1.your.domain;
    }
    # for apiHost of server-2 located in config.json
    location /client/ {
        # server's actual URI
        proxy_pass   https://server-2.your.domain;
    }
}
Enable Login to Project View
User can use the file /etc/cloudstack/management/config.json to enable the Project field displayed on Login by the setting:
Property |
Description |
|---|---|
displayProjectFieldOnLogin |
Disabled by default. When enabled, login directly to Project view |
When the Project field is set and the Project exists, the user is directly directed to the Project view instead of the Default View.

Known Limitations
The following features are no longer supported or available in the UI but are still supported at the API level and in the legacy UI:
Support for S3 based secondary storage.
NFS secondary staging storage list/resource view and add/update actions.
SSL certificate for Guest Network LB rule.
Regions.