Configuring AutoScale with using CloudStack Virtual Router
What is AutoScaling?
AutoScaling allows you to scale your back-end services or application VMs up or down seamlessly and automatically according to the conditions you define. With AutoScaling enabled, you can ensure that the number of VMs you are using seamlessly scale up when demand increases, and automatically decreases when demand subsides. Thus it helps you save compute costs by terminating underused VMs automatically and launching new VMs when you need them, without the need for manual intervention.
Hypervisor support
At that time, AutoScaling with virtual router supports KVM, VMware and Xenserver.
Prerequisites
Before you configure an AutoScale rule, consider the following:
Ensure that the necessary template is prepared before configuring AutoScale. Firstly you must install the PV-driver or virtio driver, which helps CloudStack collects performance parameters (CPU and memory) into VMs. Beside, When a VM is deployed by using a template and when it comes up, the application should be up and running.
Create an Isolated network using a network offering which supports VM AutoScaling, acquire a new IP address (it will be used as Source NAT of the network) and create a load balancer rule without any VM. For more information, see “Configure Guest Traffic in an Advanced Zone” , “Acquiring a New IP Address” and “Adding a Load Balancer Rule”.
Note
There is a known issue when CloudStack collects memory statistics from VMs on KVM hosts, see https://github.com/apache/cloudstack/pull/6358 . To get memory statistics on KVM hosts, please add the following line to /etc/cloudstack/agent/agent.properties and restart cloudstack-agent (5/10/60 are tested ok):
vm.memballoon.stats.period = <Interval in seconds to get VM stats on KVM host>
Note
There is a known issue when CloudStack collects average load balancer connections from CloudStack Virtual Routers, see https://github.com/apache/cloudstack/issues/6849
Note
The Load Balancer configurations can be found at “Load Balancer Configurations”.
Note
VmAutoScaling capability is enabled by default for network offerings which support load balanacer. To disable it, please create a network offering without VmAutoScaling support. For more information, see “Creating a New Network Offering”.
Adding an AutoScale VM Group
- Log in to the CloudStack UI as an administrator or end user.
- In the left navigation, choose Compute -> AutoScale VM Groups.
- Click the New AutoScale VM Group button.
Specify the following:
Zone: A zone where the VMs will be deployed to.
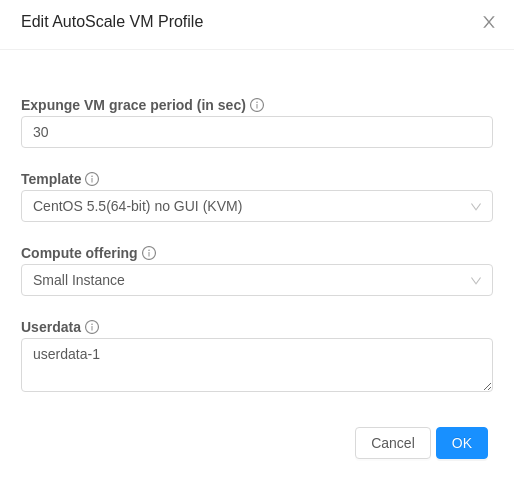
Template: A template consists of a base OS image and application. A template is used to provision the new instance of an application on a scaleup action. When a VM is deployed from a template, the VM can start taking the traffic from the load balancer without any admin intervention. For example, if the VM is deployed for a Web service, it should have the Web server running, the database connected, and so on.
Compute offering: A predefined set of virtual hardware attributes, including CPU speed, number of CPUs, and RAM size, that the user can select when creating a new virtual machine instance. Choose one of the compute offerings to be used while provisioning a VM instance as part of scaleup action.
Data disk: An extra disk attached to each VM instance in the VM group.
Networks: The networks of the VM instances. If there are multiple networks checked, the network of the load balancer rule will be the default network of VM instances.
Load balancing rule: When a VM instance is created, it will be automatically assigned to the load balancing rule. When a VM instance is expunged, it will be removed from the load balancing rule.
ScaleUp policies: The policies for ScaleUp action. When all of the conditions in one of the ScaleUp policies are met, CloudStack will create a VM instance if the number of VMs do not exceed Max Instance.
For more information, see “AutoScale policies”.
ScaleDown policies: The policies for ScaleDown action. When all of the conditions in one of the ScaleDown policies are met, CloudStack will expunge a VM instance in the group if the number of VMs is larger than Min Instance.
For more information, see “AutoScale policies”.
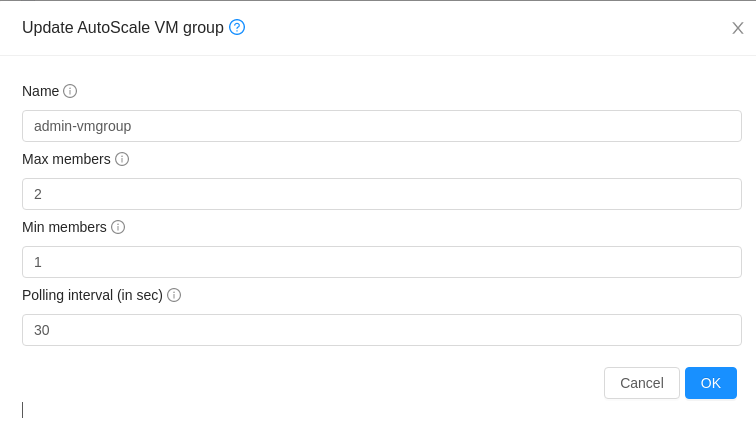
Name: The name of the VM group. The name of new VM instances will use the name of the VM group as prefix.
Min Instance: The minimum number of active VM instances that is assigned to a load balancing rule. The active VM instances are the application instances that are up and serving the traffic, and are being load balanced. This parameter ensures that a load balancing rule has at least the configured number of active VM instances are available to serve the traffic.
Max Instance: Maximum number of active VM instances that should be assigned to a load balancing rule. This parameter defines the upper limit of active VM instances that can be assigned to a load balancing rule.
Specifying a large value for the maximum instance parameter might result in provisioning large number of VM instances, which in turn leads to a single load balancing rule exhausting the VM instances limit specified at the account or domain level.
Polling interval: Frequency in which the conditions, combination of counter, operator and threshold, are to be evaluated before taking a scale up or down action. The default polling interval is 30 seconds.
Expunge VM Grace Period: The duration in seconds, after a scaledown action is initiated, to wait before the VM is expunged as part of scaledown action. This is to ensure graceful close of any pending sessions or transactions being served by the VM marked for expunge. The default is 120 seconds.
Create: Click Create to create the AutoScale VM group.
Additionally, if you want to configure the advanced settings, click Show advanced settings, and specify the following:
SSH key pairs: The SSH Keys of the VM instances.
For more information, see “Using SSH Keys for Authentication”.
Affinity groups: The affinity groups of the VM instances.
For more information, see “Affinity Groups”.
Userdata: The userdata of the VM instances.
For more information, see “User-Data and Meta-Data”.
AutoScale Policies
An AutoScale Vm Group must have one or more scale-up policies, and one or more scale-down policies.
Each AutoScale Policy has the following parameters:
- Duration: The duration, in seconds, for which the conditions you specify must be true to trigger a scale action. The conditions defined should hold true for the entire duration you specify for an AutoScale action to be invoked.
- Quiet Time: This is the cool down period after an AutoScale action is initiated. The time includes the time taken to complete provisioning a VM instance from its template and the time taken by an application to be ready to serve traffic. This quiet time allows the fleet to come up to a stable state before any action can take place. The default is 300 seconds.
- Action: The scale action. The options are ScaleUp and ScaleDown.
- Conditions: A policy must contain at least one condition.
Each condition in AutoScale policies has the following parameters:
Counter: The performance counters expose the state of the monitored instances. We added five new counters to work with that feature:
- VM CPU - average percentage
- VM Memory - average percentage
- Public Network - mbps received per vm
- Public Network - mbps transmit per vm
- Load Balancer - average connections per vm
Remember to choose one of them. If you choose anything else, the autoscaling will not work.
Operator: The following five relational operators are supported in AutoScale feature: Greater than, Less than, Less than or equal to, Greater than or equal to, and Equal to.
Threshold: Threshold value to be used for the counter. Once the counter defined above breaches the threshold value, the AutoScale feature initiates a scaleup or scaledown action.
Note
The counter “VM Memory - average percentage” calculates the average memory usage of available VMs (in Starting, Stopping, Running, Migrating states) in the AutoScale VM Group. On KVM/XenServer, the VM memory usage is calculated by
VM memory usage percentage = (total memory - free memory) * 100 / total memory
Note
The counters “Public Network - mbps received per vm” and “Public Network - mbps transmit per vm” consider all public traffic through the VR public interface, including the traffic from/to other VMs which are not in the AutoScale VM group.
Note
Each network has a network rate which are configured by global configuration network.throttling.rate and “Network rate (Mb/s)” in network offering.
Disabling and Enabling an AutoScale VM Group
You can view the detail of the AutoScale VM Group.
- Log in to the CloudStack UI as an administrator or end user.
- In the left navigation, choose Compute -> AutoScale VM Groups.
- Select the AutoScale VM Group you want to work with.
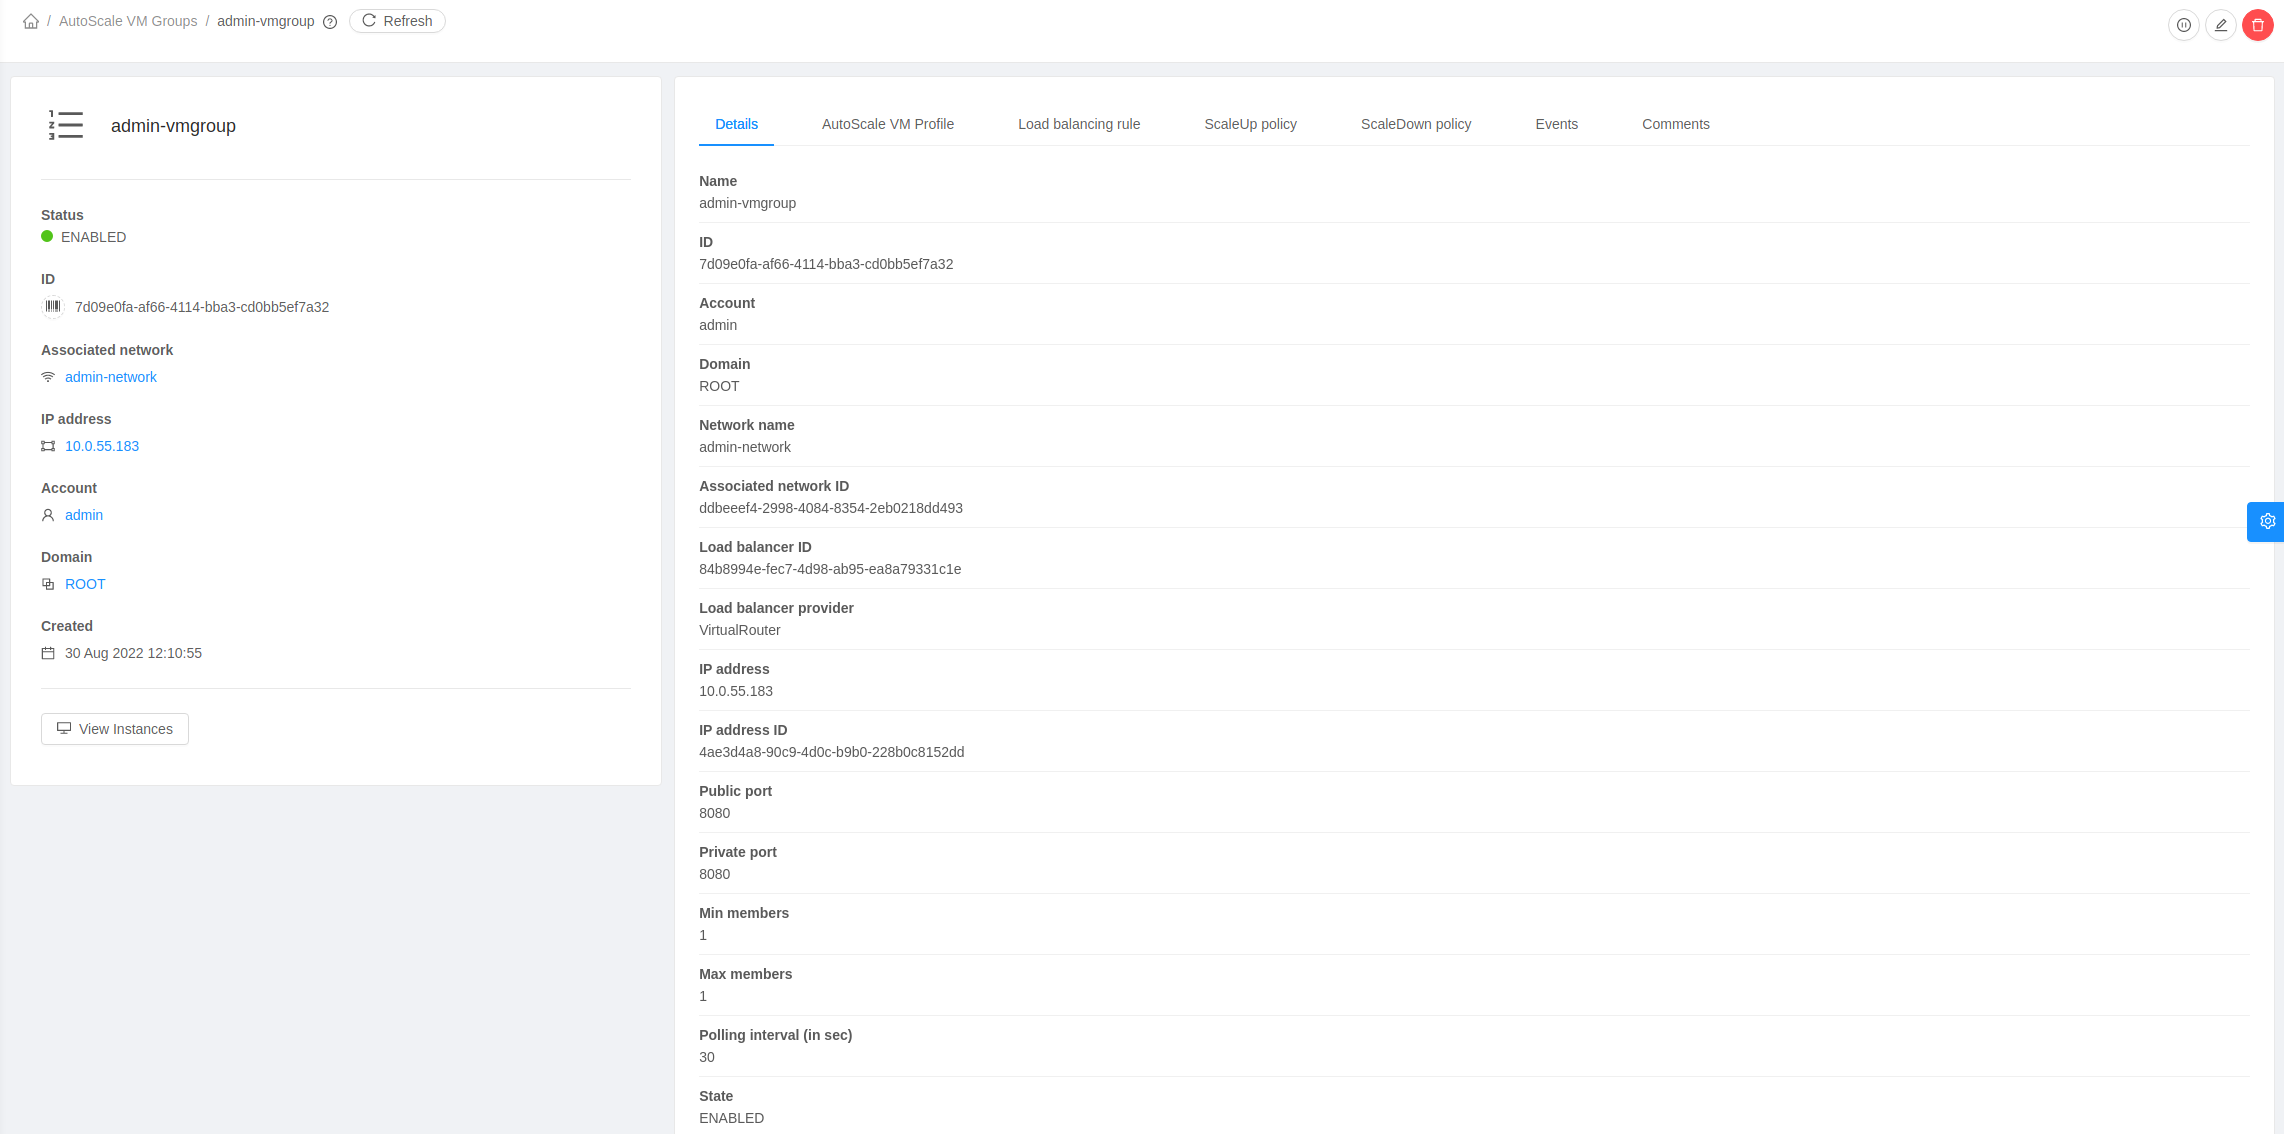
If you want to perform any maintenance operation on the AutoScale VM instances, disable the AutoScale VM Group. When the AutoScale VM Group is disabled, no scaleup or scaledown action is performed. You can use this downtime for the maintenance activities. To disable the AutoScale VM Group, click the Disable AutoScale VM Group button.
The button toggles between enable and disable, depending on whether AutoScale is currently enabled or not. After the maintenance operations are done, you can enable the AutoScale VM Group back. To enable the AutoScale VM Group, click the Enable AutoScale VM Group button.
Updating an AutoScale VM Group
You can update the various parameters of VM profile, and add or delete the conditions in a scaleup or scaledown policy. Before you update an AutoScale VM Group, ensure that you disable the AutoScale VM Group by clicking the Disable AutoScale button.
To update the AutoScale VM Group, click the Update AutoScale VM Group button.
Updating AutoScale VM Profile
To update the VM Profile of the AutoScale VM Group, click the AutoScale VM Profile tab, then click Edit AutoScale VM Profile button.
You are also able to update the deploy parameters of the VM instances.
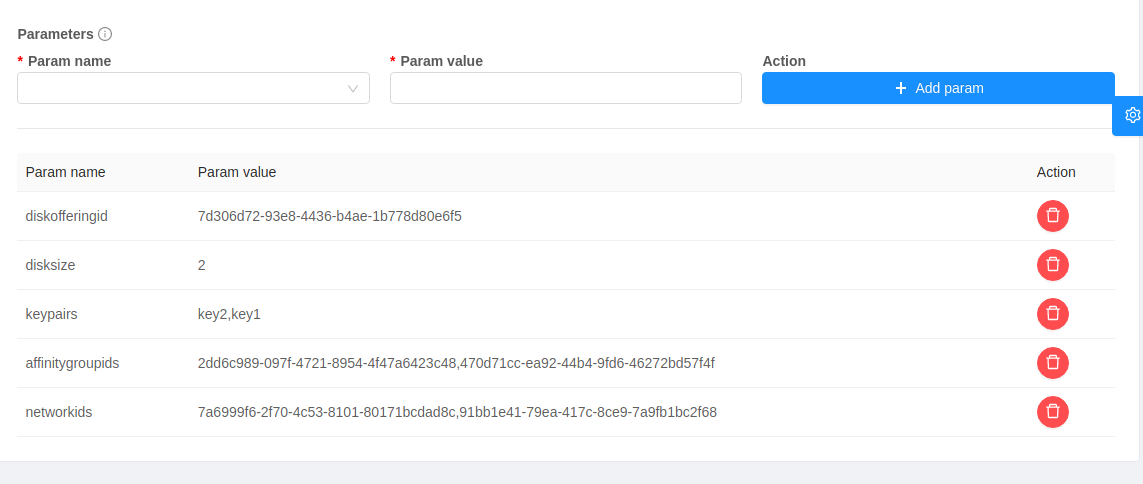
The following parameters are supported.
- affinitygroupids: The UUID of the affinity groups, separated by a single comma character (,).
- diskofferingid: The UUID of the data disk.
- disksize: The size of data disk. This is valid only if the disk offering is dynamic.
- keypairs: The name of the SSH Key pairs, separated by a single comma character (,).
- networkids: The UUID of the VM networks, separated by a single comma character (,).
- overridediskofferingid: The UUID of override disk offering for ROOT disk.
- rootdisksize: The size of the ROOT disk. This overrides the size of VM template.
- securitygroupids: The UUID of security groups, separated by a single comma character (,). This is valid only if the network provider is Netscaler.
Adding an AutoScale policy
To add a new Scale policy to the AutoScale VM Group, click the ScaleUp policy or ScaleDown policy tab, then click “Add policy”.

For more information, see “AutoScale policies”.
Updating AutoScale policies
To update the AutoScale policies of the AutoScale VM Group, click the ScaleUp policy or ScaleDown policy tab.
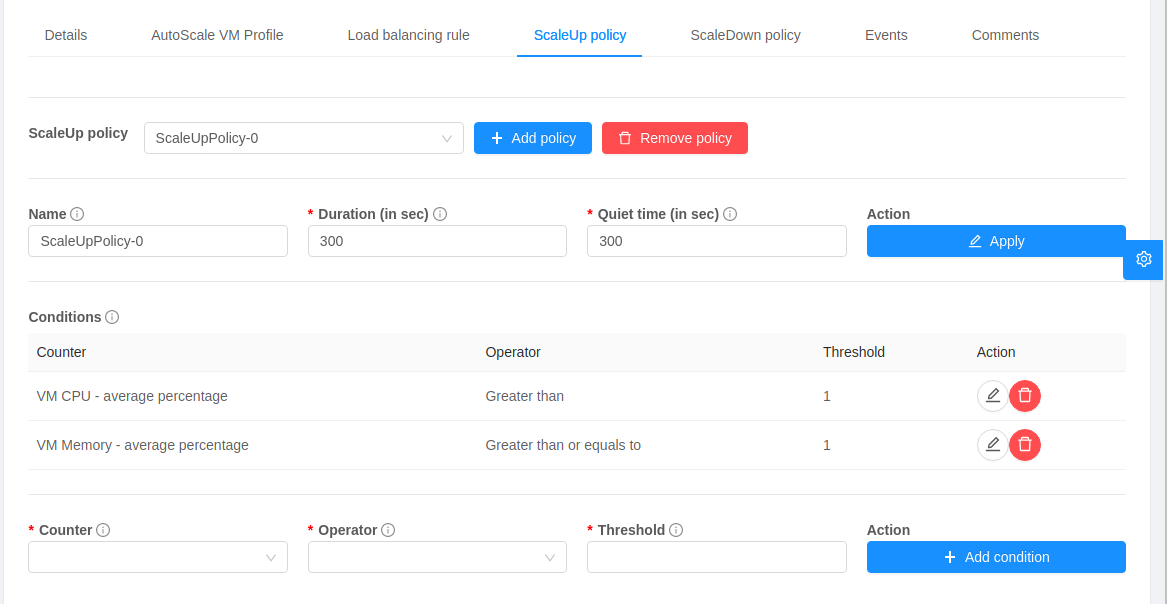
To update an existing AutoScale policies, select a policy, input the new value of Duration or Quiet time, then click Edit button.
To add a new condition to the policy, choose Counter and Operator and input the value, click Add condition.
To remove an existing condition from the policy, click Delete button of the condition.
To update a condition in the policy, click Edit button, choose Operator and input the value, click OK button.
Removing an AutoScale policy
To remove an existing AutoScale policies, select a policy, click “Remove policy” button.
Note
To apply the new AutoScale VM Profile and AutoScale policies, open the AutoScale VM Group details, then click the Enable AutoScale VM Group button.
Deleting an AutoScale VM Group
To remove an AutoScale VM Group, click “Delete AutoScale VM Group” button.
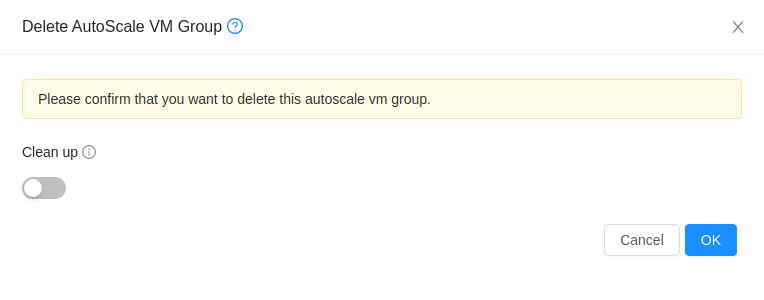
AutoScale VM Group can be removed only if there is no VM in the group.
To force-delete the AutoScale VM Group, check the cleanup checkbox, then click OK button. All the VMs in the group will be expunged.
Runtime Considerations
An administrator should not assign a VM to a load balancing rule which is configured for AutoScale.
Making API calls outside the context of AutoScale, such as destroyVM, on an autoscaled VM leaves the load balancing configuration in an inconsistent state. Though VM is destroyed from the load balancer rule, it continues be showed as a service assigned to a rule inside the context of AutoScale.